
When weather turns or daylight fades, a simple shelter can make the difference between a rough night and a manageable one. This gallery walks through fast, low-tech structures you can improvise with sticks, leaf litter, bark, and downed timber already on the forest floor. The focus is speed, common sense, and designs that work with the landscape instead of fighting it.
Lean-To Shelter

The lean-to is the classic quick-build option because it asks for very little: a sturdy ridge support, a wall of angled poles, and a thick layer of leafy insulation. Set it with the open side away from prevailing wind, and it starts feeling useful fast.
What makes this design so appealing is its efficiency. You can spend more time piling on debris than fussing with structure, which is exactly what you want when temperature is dropping.
A lean-to shines best when paired with a deep bed of dry leaves or pine boughs underneath. The roof matters, but the insulation below your body often matters even more.
Debris Hut

If you need warmth more than elbow room, a debris hut is one of the smartest shelters in the woods. It is built small on purpose, just big enough for your body, so it traps heat instead of letting it drift away into a roomy interior.
The frame is simple: one long ridgepole, a rib cage of sticks, then a very generous coat of leaves, ferns, or pine needles. The magic is in the thickness. Skimpy coverage looks shelter-like, but real insulation takes a lot more material.
Done well, a debris hut feels less like architecture and more like a dry nest. It is cramped, yes, but on a cold night, compact can be a real luxury.
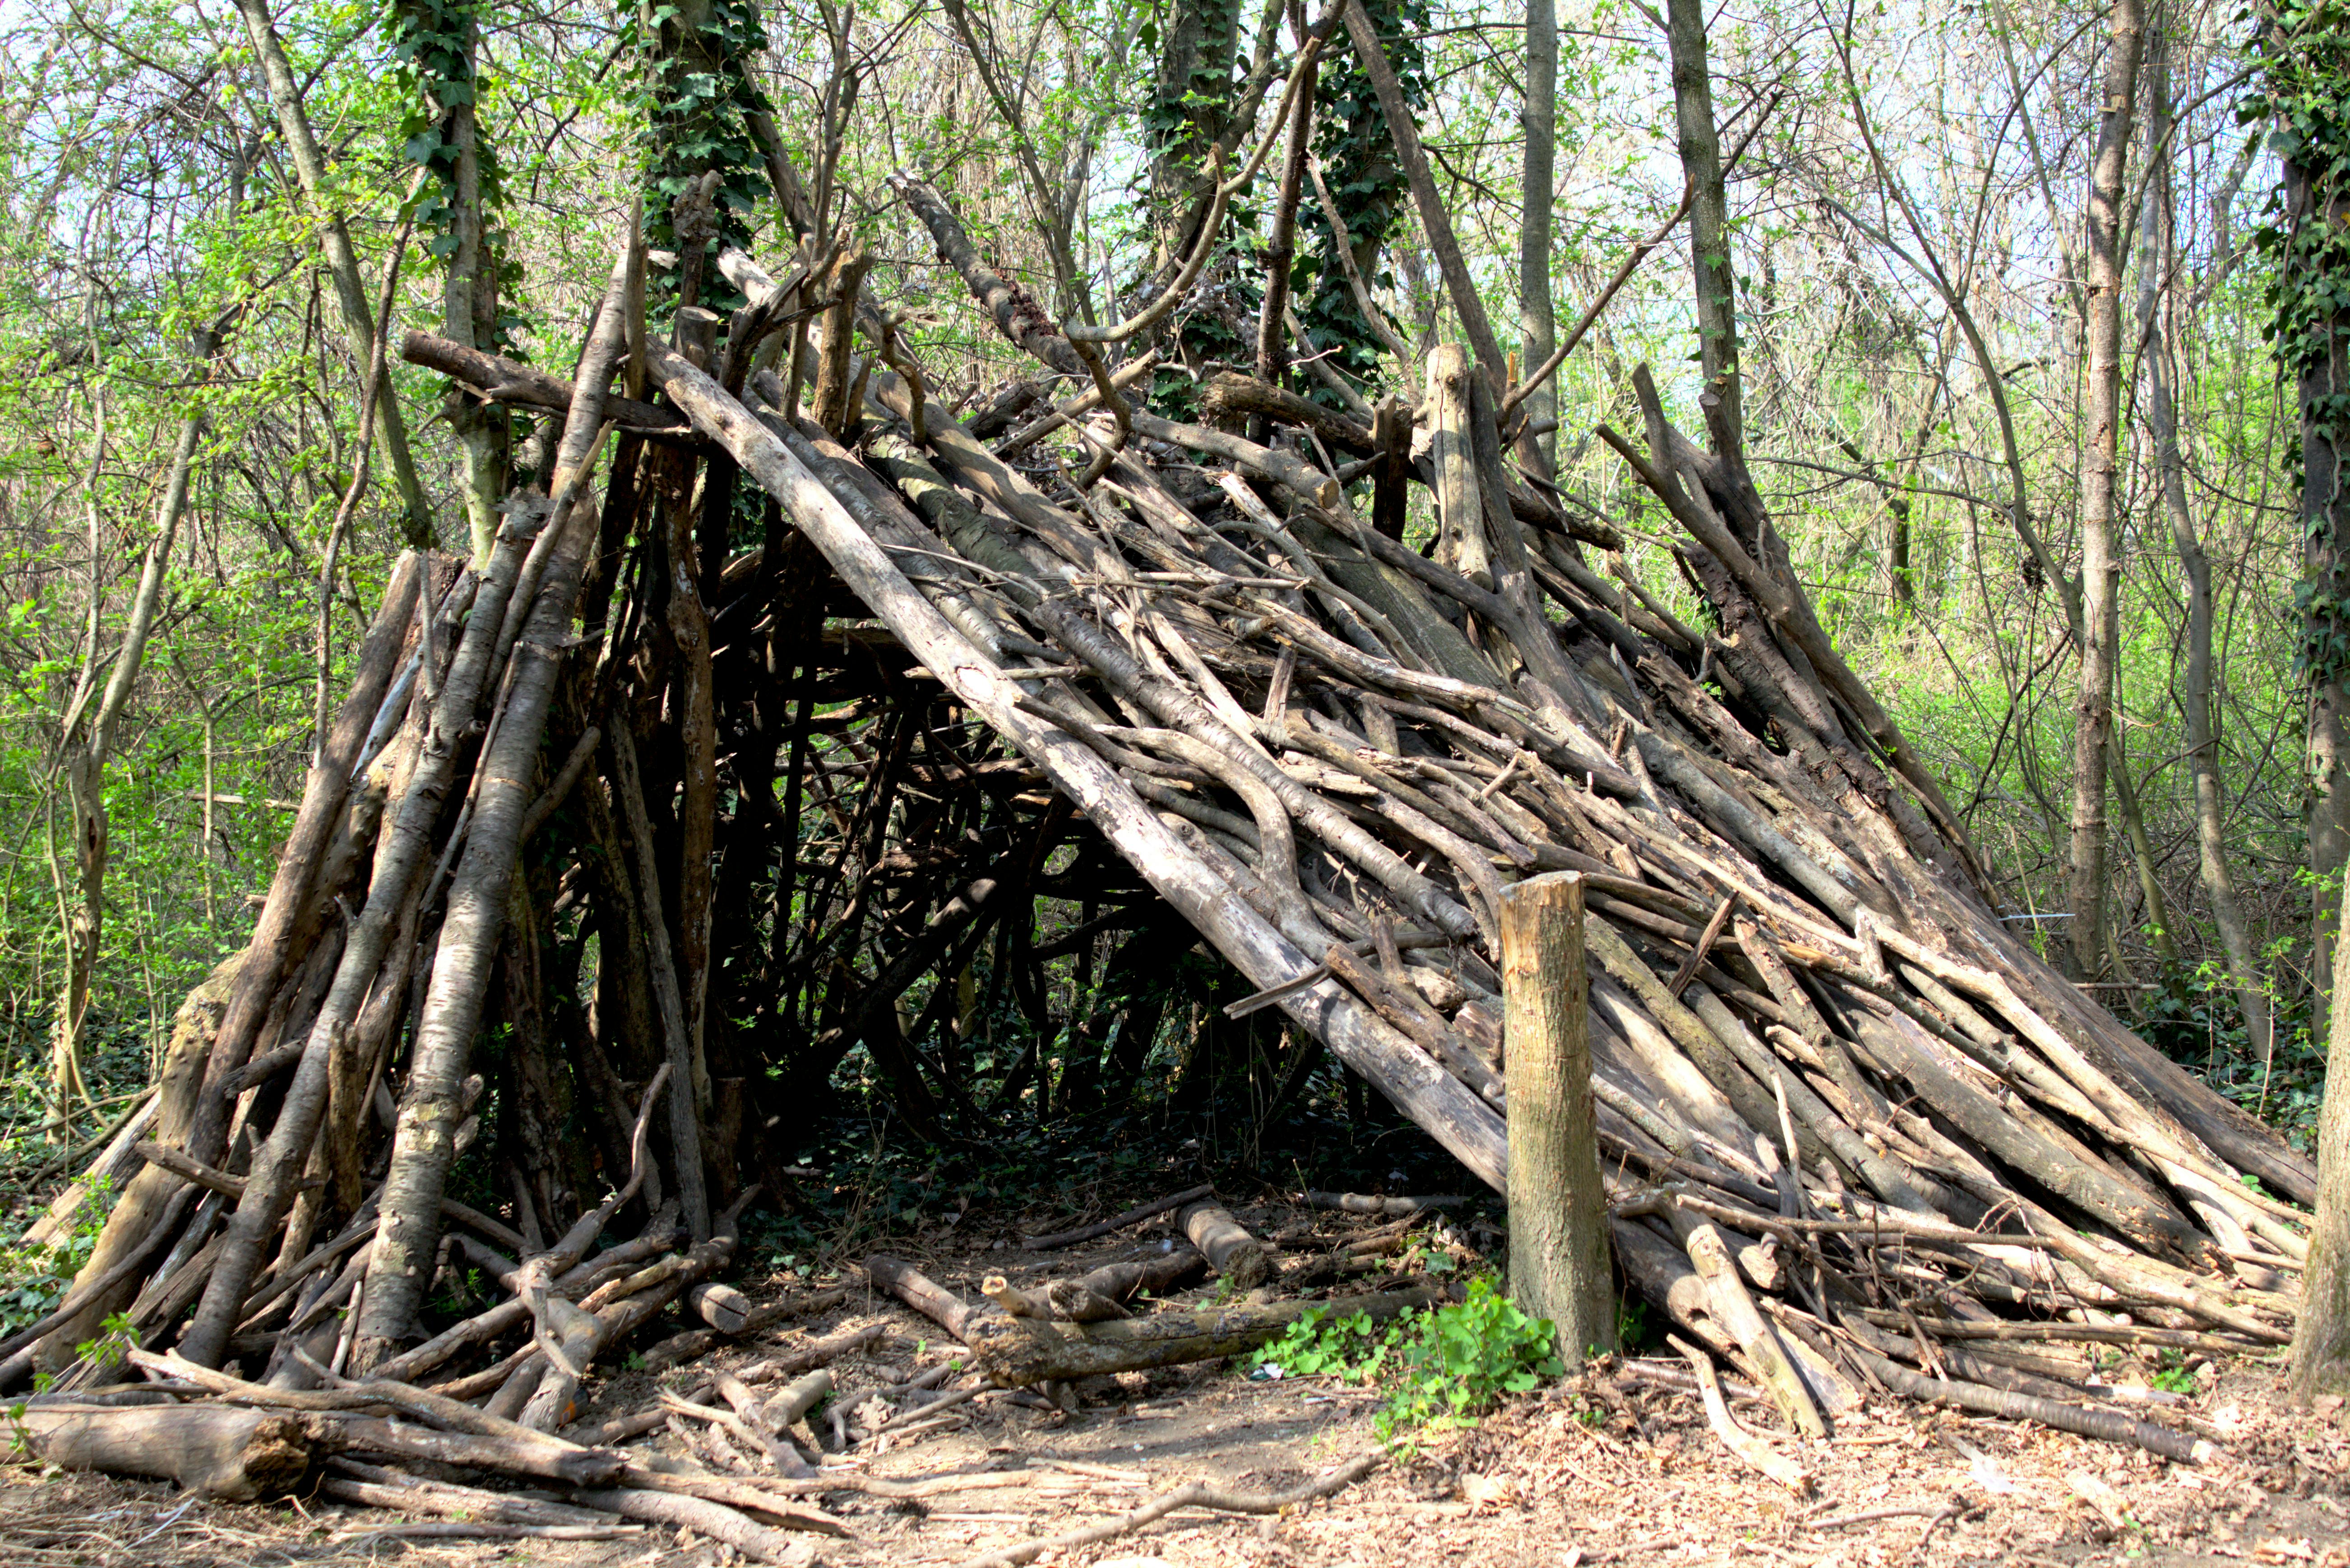
A-Frame Shelter
The A-frame is a familiar shape for good reason. With two sloping sides meeting over a center ridge, it sheds light rain well and creates a bit more balance than a one-sided lean-to.
This is a great choice when you have plenty of straight saplings or fallen branches to work with. Lash if you can, wedge if you must, and then cover the frame heavily with bark slabs, evergreen boughs, or armloads of leaves.
The tradeoff is labor. You are building and covering two roof faces instead of one, but the payoff is better enclosure and a structure that feels reassuringly solid in changeable weather.
Fallen Tree Shelter
A downed log can do half the structural work for you, which is exactly the kind of shortcut you want when time is short. One side of the trunk becomes your anchor, windbreak, and visual guide for the rest of the build.
Prop branches against the log to create a slanted roof, then pack in smaller sticks and insulating debris until gaps disappear. It is a practical way to turn an existing forest feature into something that feels intentional.
The key is choosing the right tree. Avoid anything suspended, rotten, or likely to shift. A solid fallen trunk can save energy, but a dangerous one is not worth the risk.
Rock Overhang Shelter

When the landscape offers a shallow rock overhang, your job becomes less about construction and more about improving what is already there. A natural roof can save precious time and spare you the effort of building overhead cover from scratch.
Use branches, brush, and leaf litter to close off the open side or block crosswinds. A thick ground bed is especially important here because stone and packed earth can pull warmth from your body surprisingly fast.
This option is fast, but it demands caution. Stay clear of unstable rock, damp seepage zones, and tight spaces that show signs of animal use. The best shortcut is still one you can sleep in safely.
Wickiup Shelter
The wickiup has a rounded, dome-like shape that feels more substantial than many emergency shelters, but it can still come together quickly if materials are close at hand. Flexible poles form the skeleton, and layers of brush or bark turn that frame into a weather barrier.
Because the shape curves inward, it handles wind nicely and creates a cozy interior without demanding much precision. It is not about perfect symmetry. It is about making a compact shell that holds insulation well.
This design works especially well in forests with lots of bendable saplings and abundant ground cover. The result can look rustic and rough, yet still feel surprisingly protective once finished.
Bark Roof Shelter
In forests where bark peels naturally from fallen or dead wood, you can create a shelter roof that feels far more finished than a simple leaf covering. Bark sheds water better than loose debris and can turn a basic frame into a noticeably drier refuge.
The structure beneath can be a lean-to or A-frame, whichever suits the site. What matters is overlapping the bark like shingles so water runs down and away instead of slipping through cracks.
This is one of those shelters where material choice changes everything. Use only bark that is already loose or available from downed timber, and let the forest offer the roofing instead of forcing it.
Evergreen Bough Shelter
A shelter built mostly from evergreen boughs has an immediate visual appeal, but it is more than pretty. Dense conifer branches layer well, block wind effectively, and add a measure of springy insulation to both roof and bedding.
This style is especially useful in pine, fir, or spruce country where branches are abundant on downed limbs or lower growth. Stack them thickly, always working from the bottom up so the upper layers overlap like scales.
The scent alone can make the setup feel less desperate, but the real advantage is practical. A well-layered bough shelter can go up quickly and provide a decent buffer against drizzle, drafts, and damp ground.
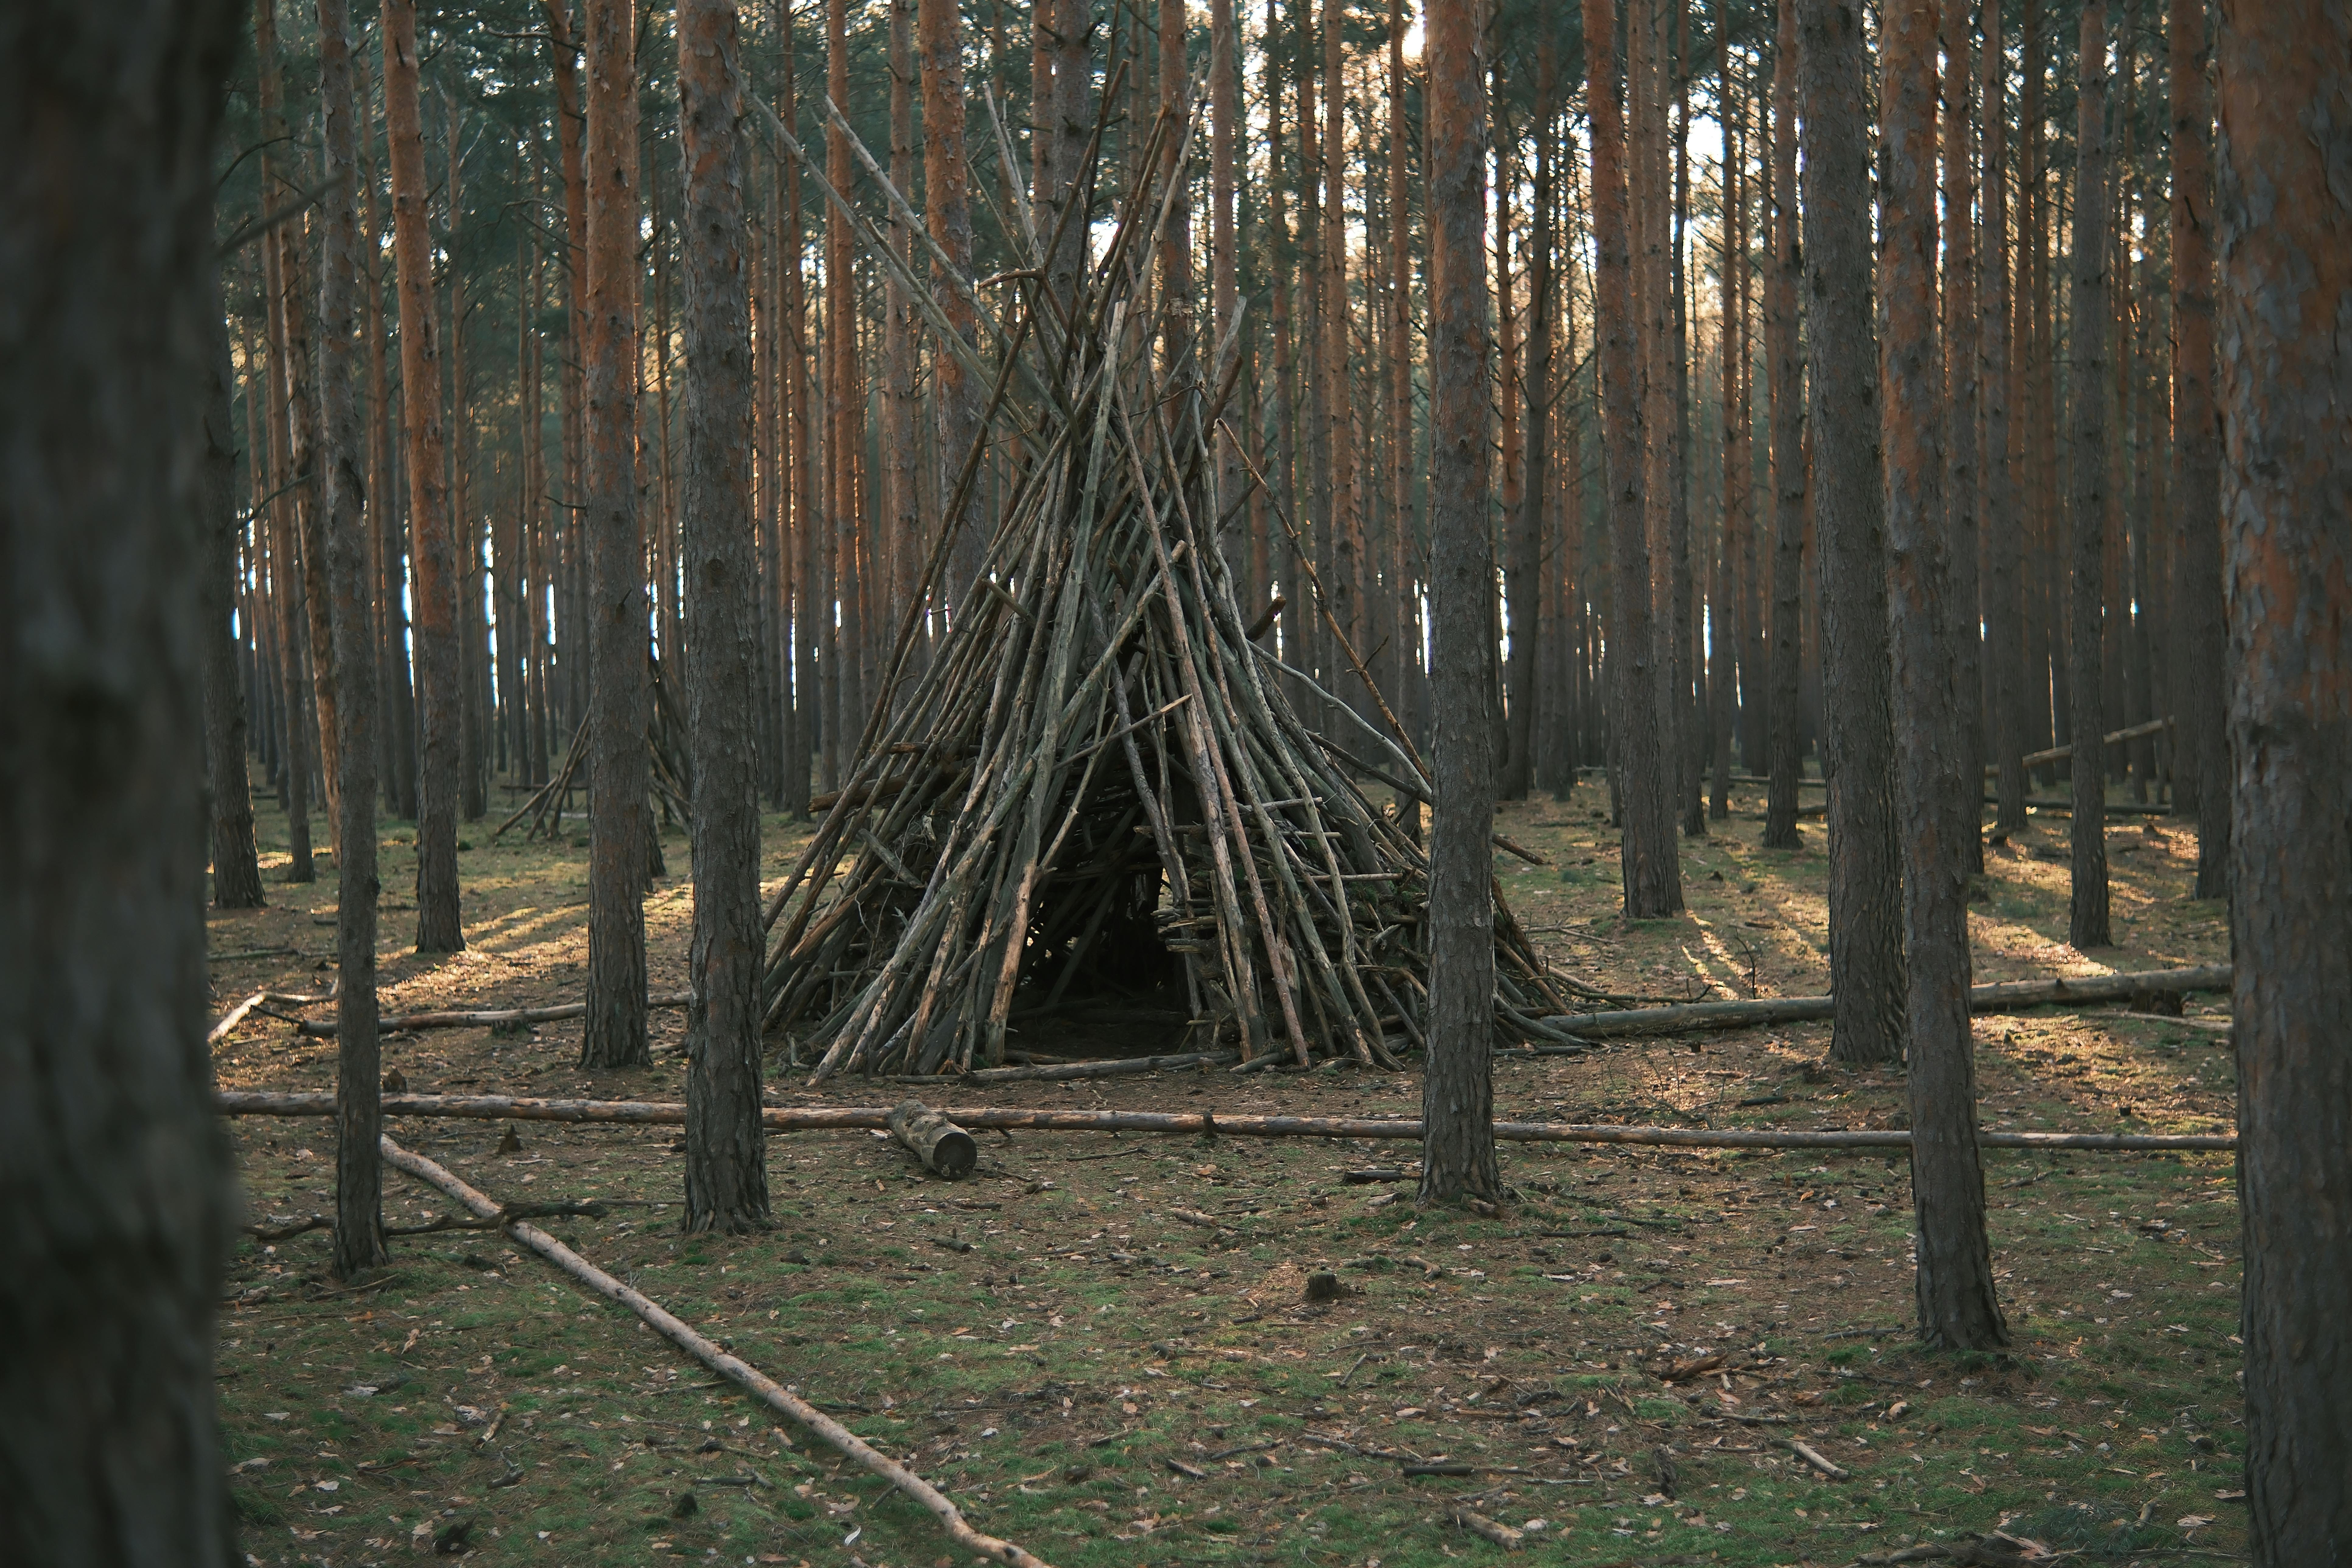
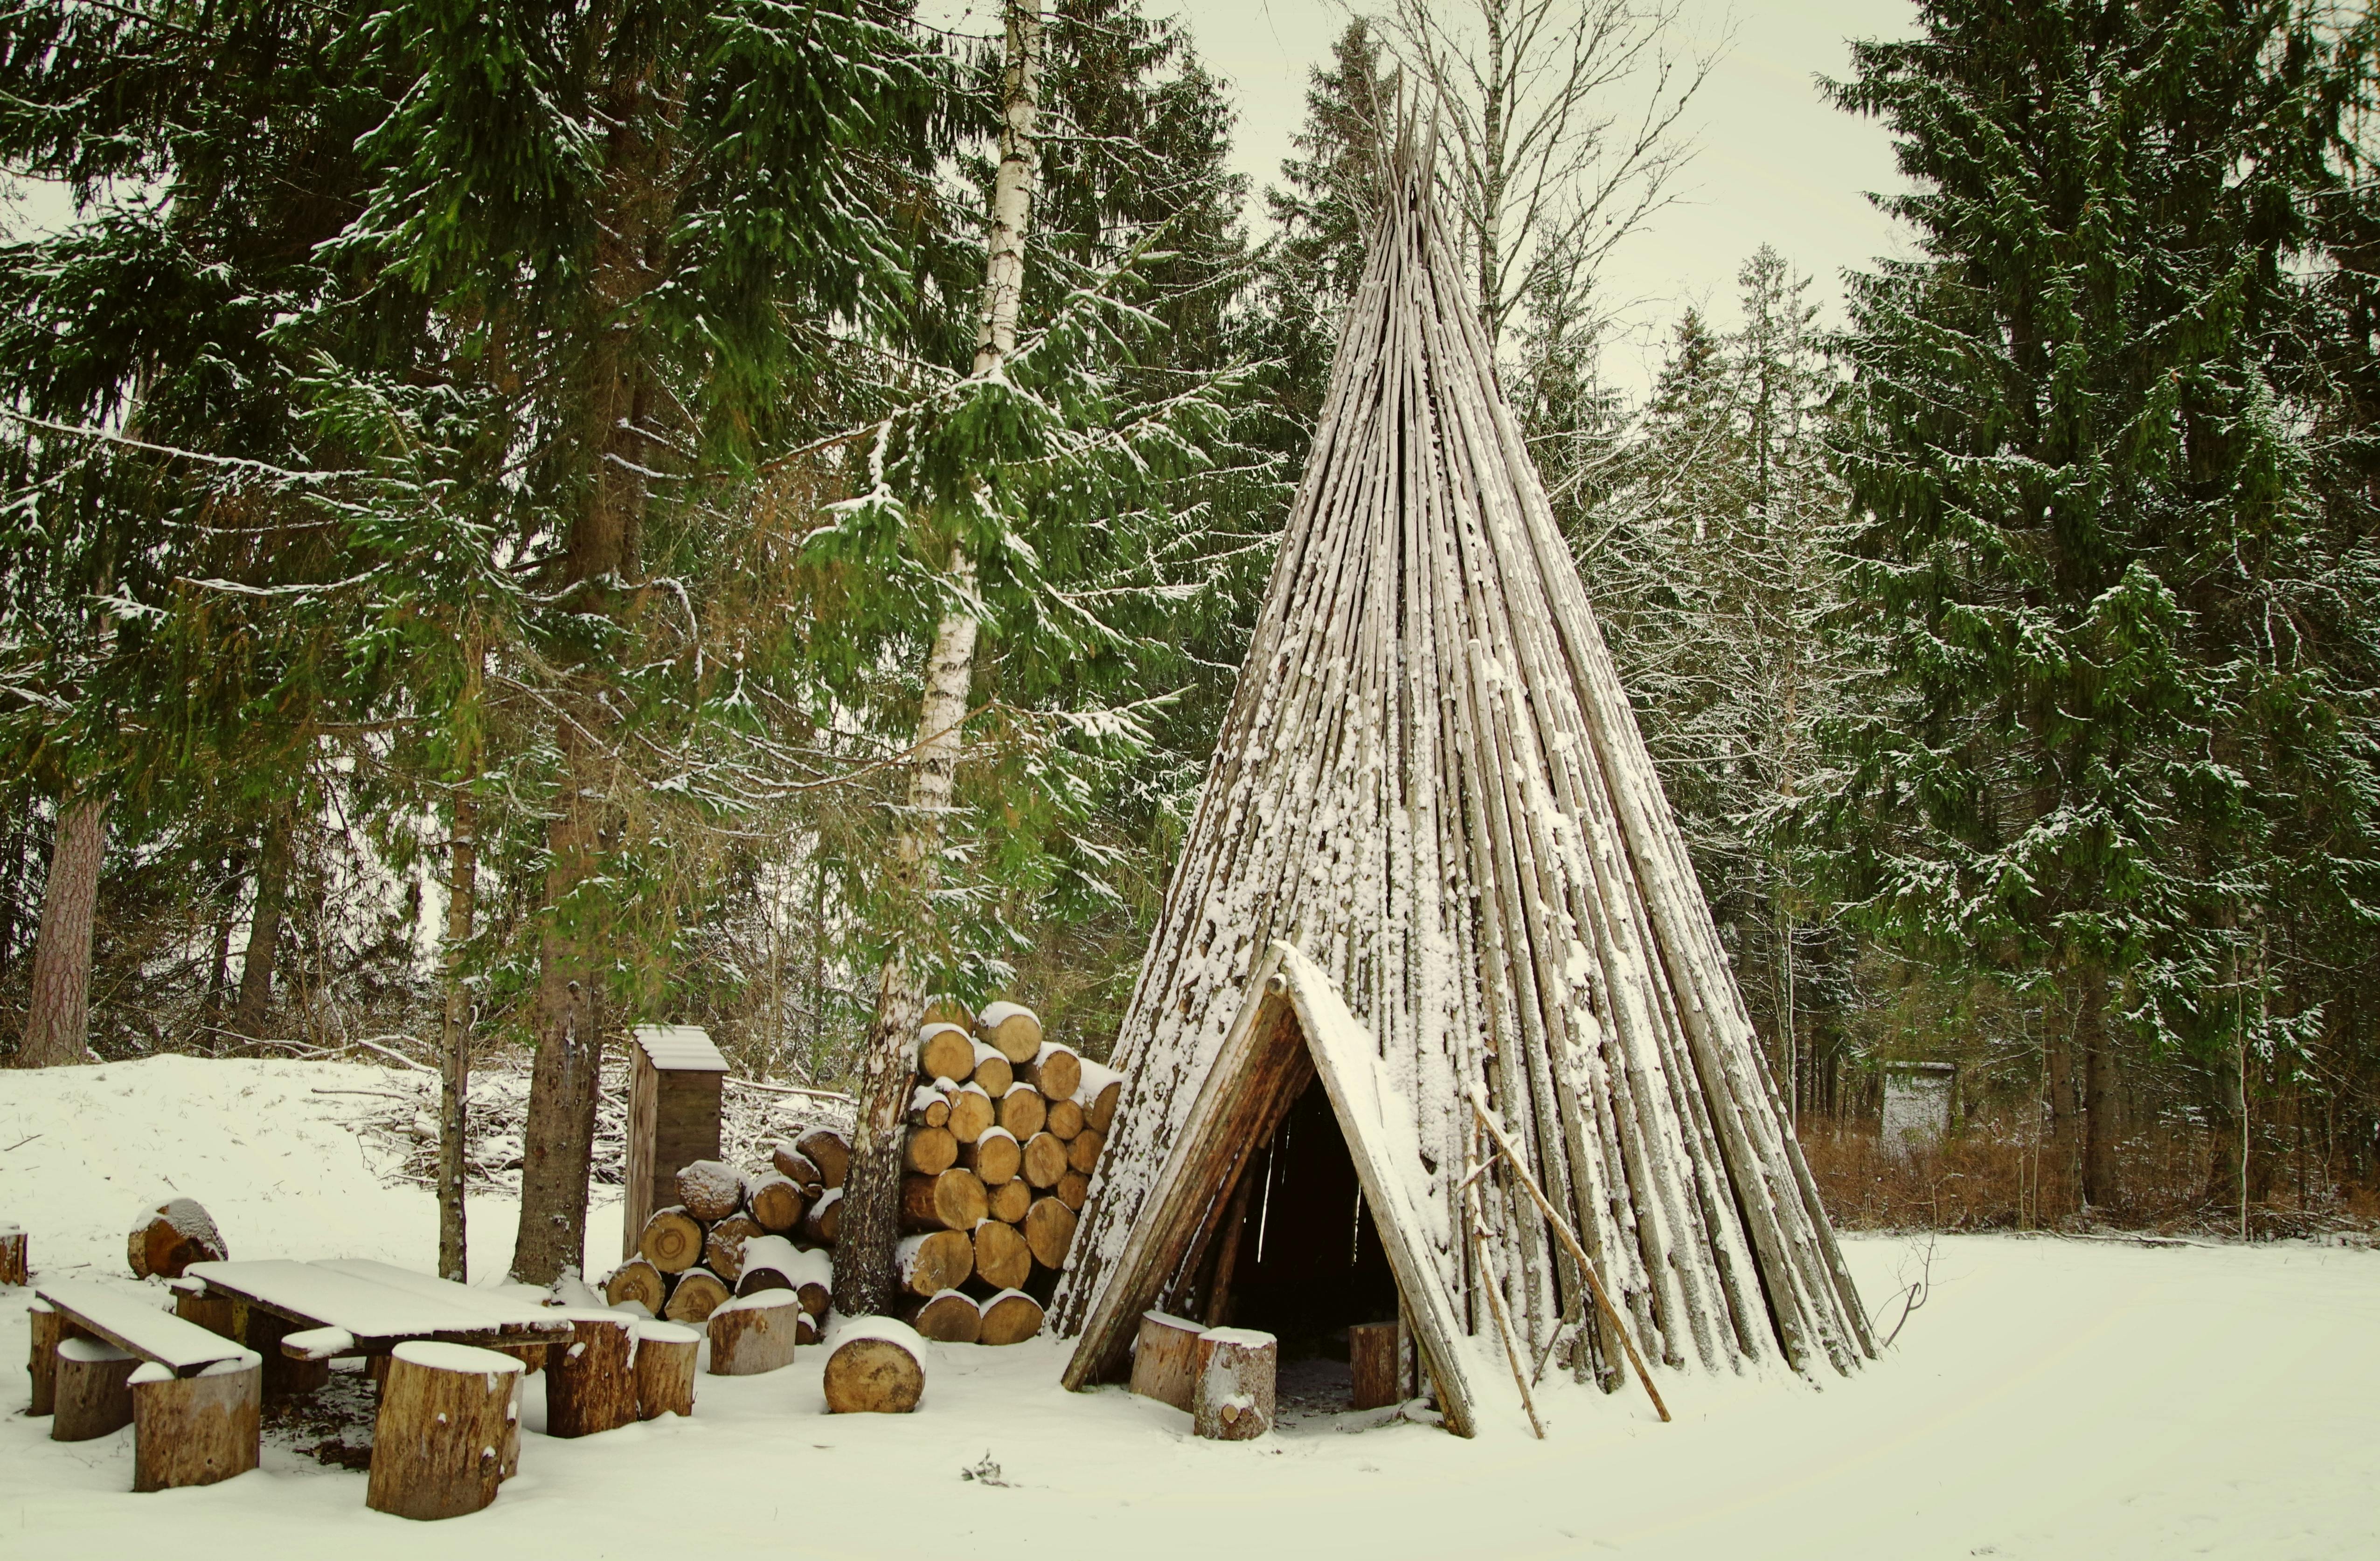
Sapling Tripod Shelter
A tripod shelter starts with three long poles lashed or wedged together, then spreads into a conical or partial cone frame. It is fast, stable, and especially handy when you lack a convenient tree, rock, or fallen log to build against.
Once the tripod stands, you can lean additional poles around it and cover the frame with foliage, bark, or leaf litter. The footprint stays compact, which helps retain warmth and keeps material demands manageable.
This shelter is a strong choice for uneven ground because it can be adjusted as you go. It also feels intuitive to build, making it a favorite for beginners who want a structure that comes together without much fuss.
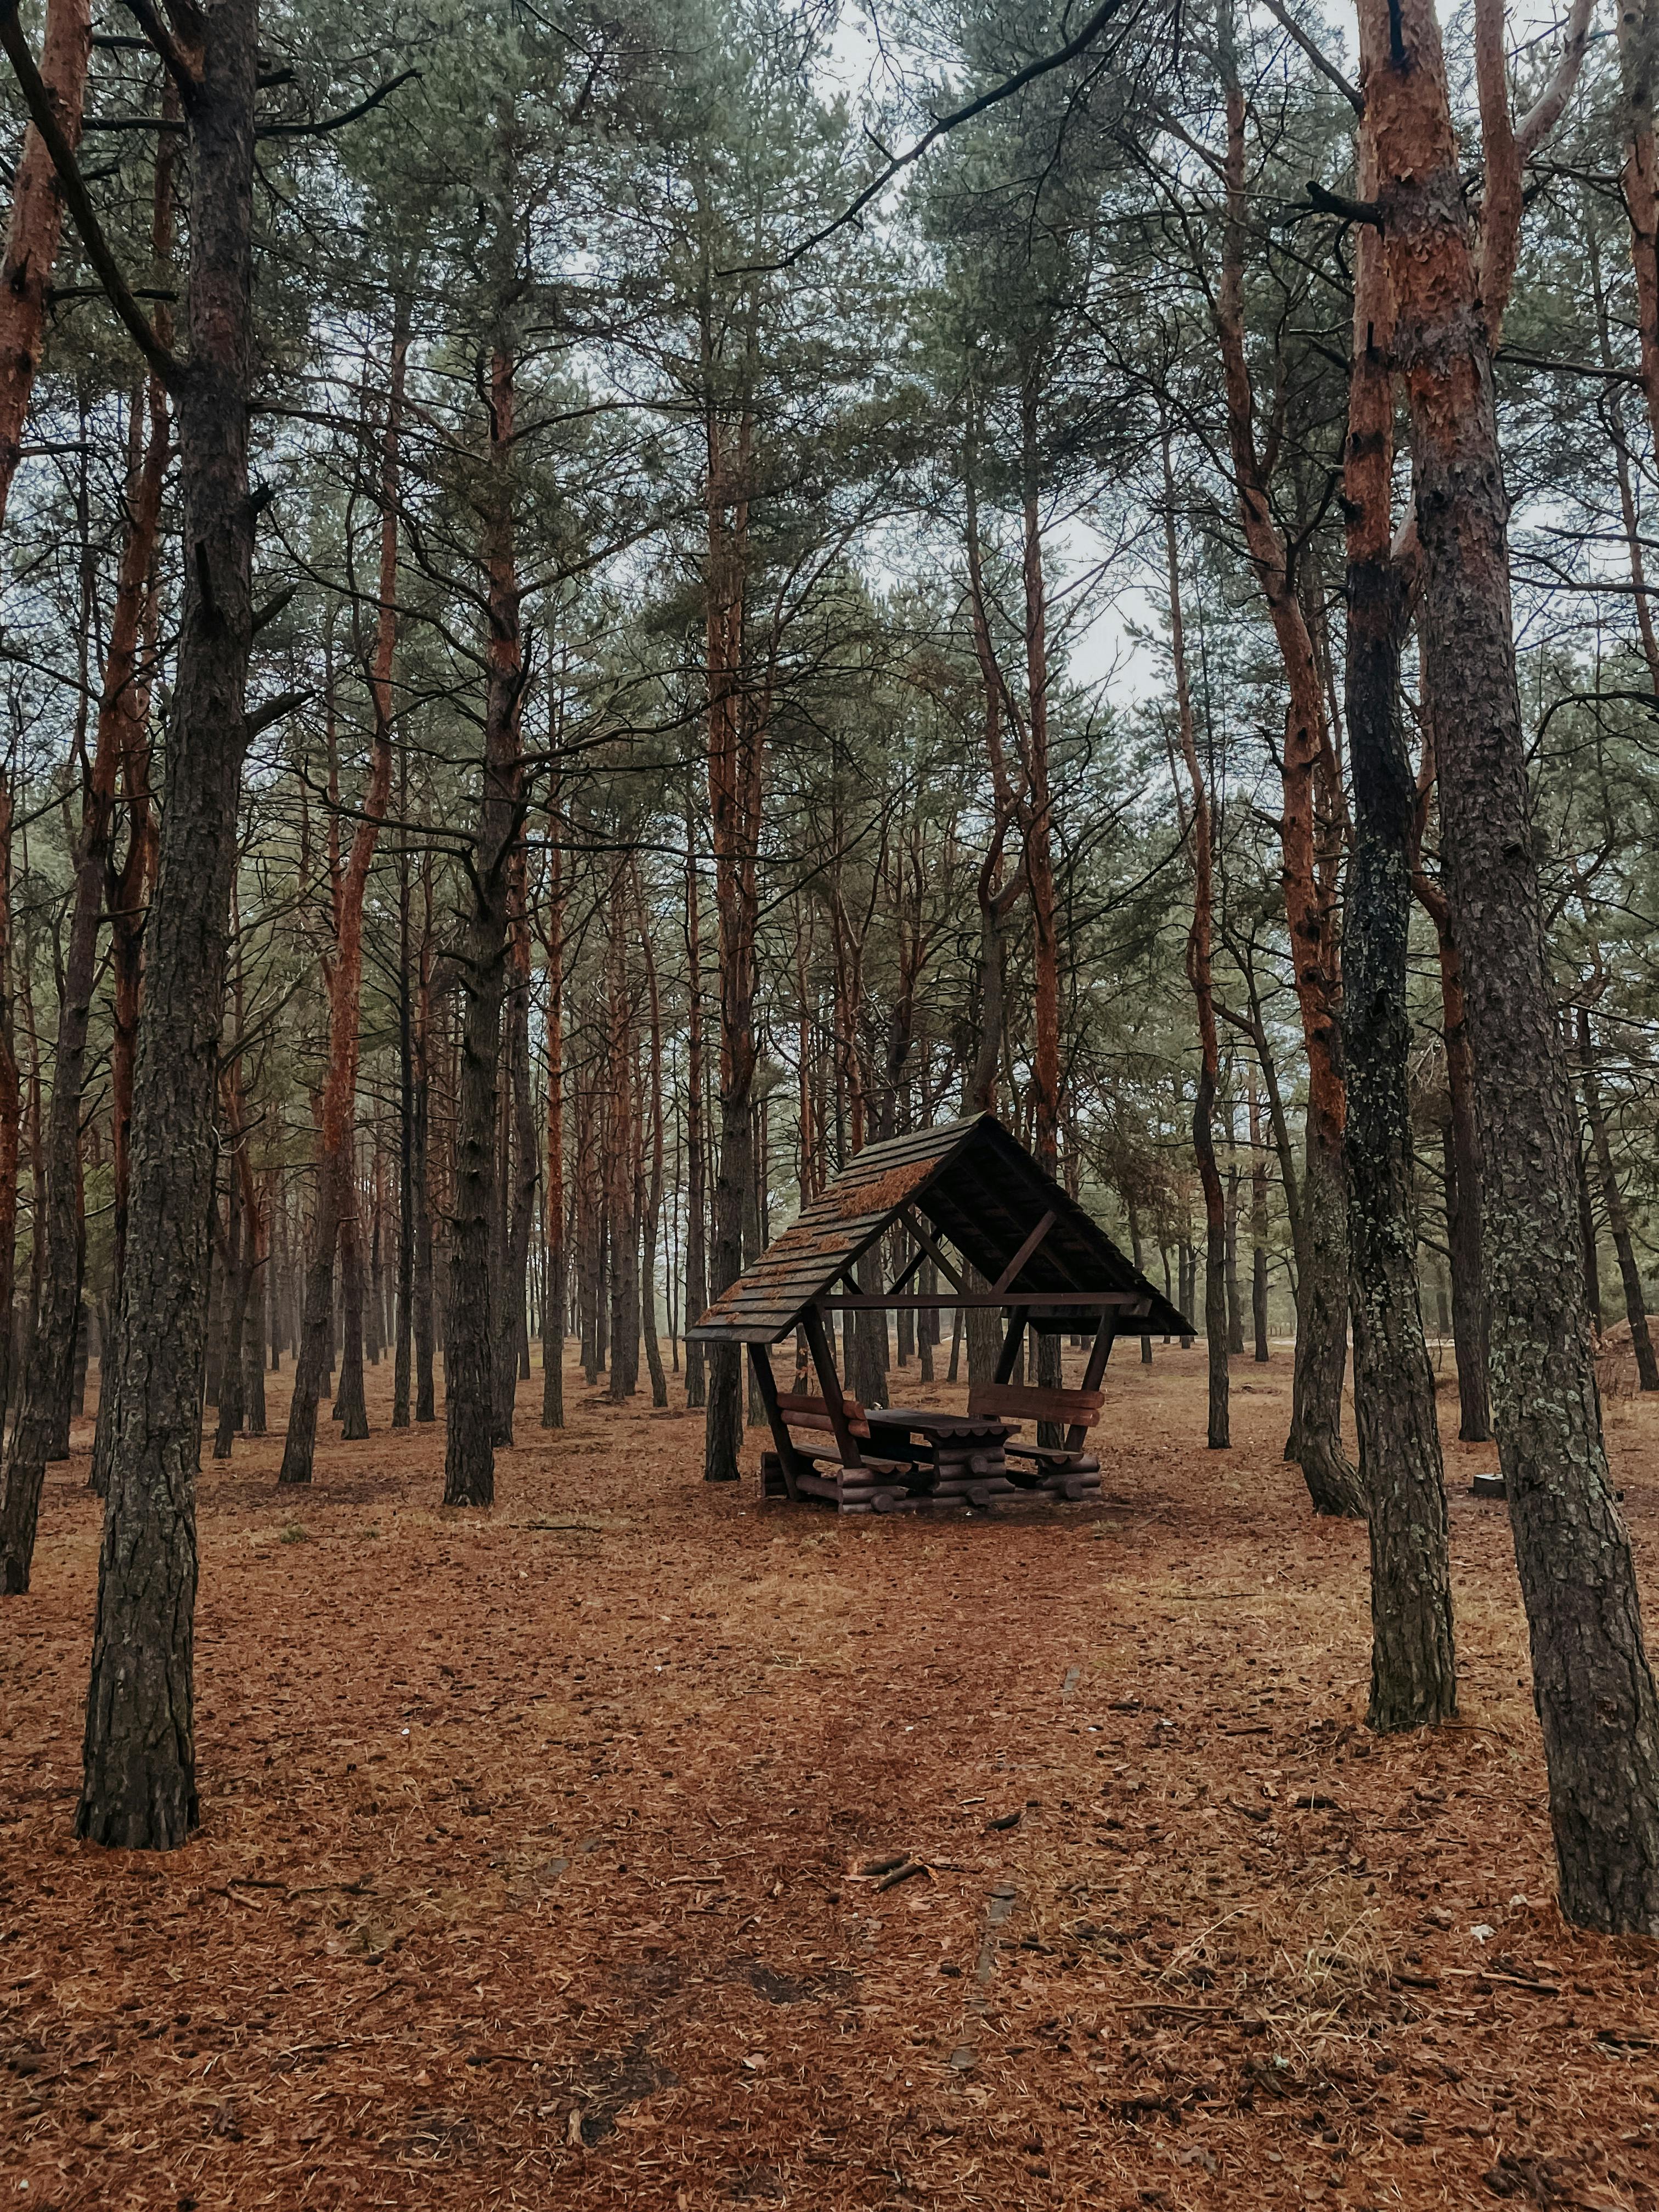
Log Ridge Shelter
If you can safely position a stout pole or use a low horizontal log as a ridge, the rest of the shelter becomes a straightforward exercise in layering. Angled branches line both sides or one side, depending on whether you want an A-frame or lean-to profile.
This design is all about making a clean backbone for the structure. Once that central line is secure, smaller materials can be added quickly, and the whole shelter tends to feel more organized and sturdy.
The real advantage here is rhythm. Gather poles, set the ridge, stack the ribs, add cover, then heap on insulation. In a time-sensitive situation, a build with a clear sequence is often the easiest to finish well.
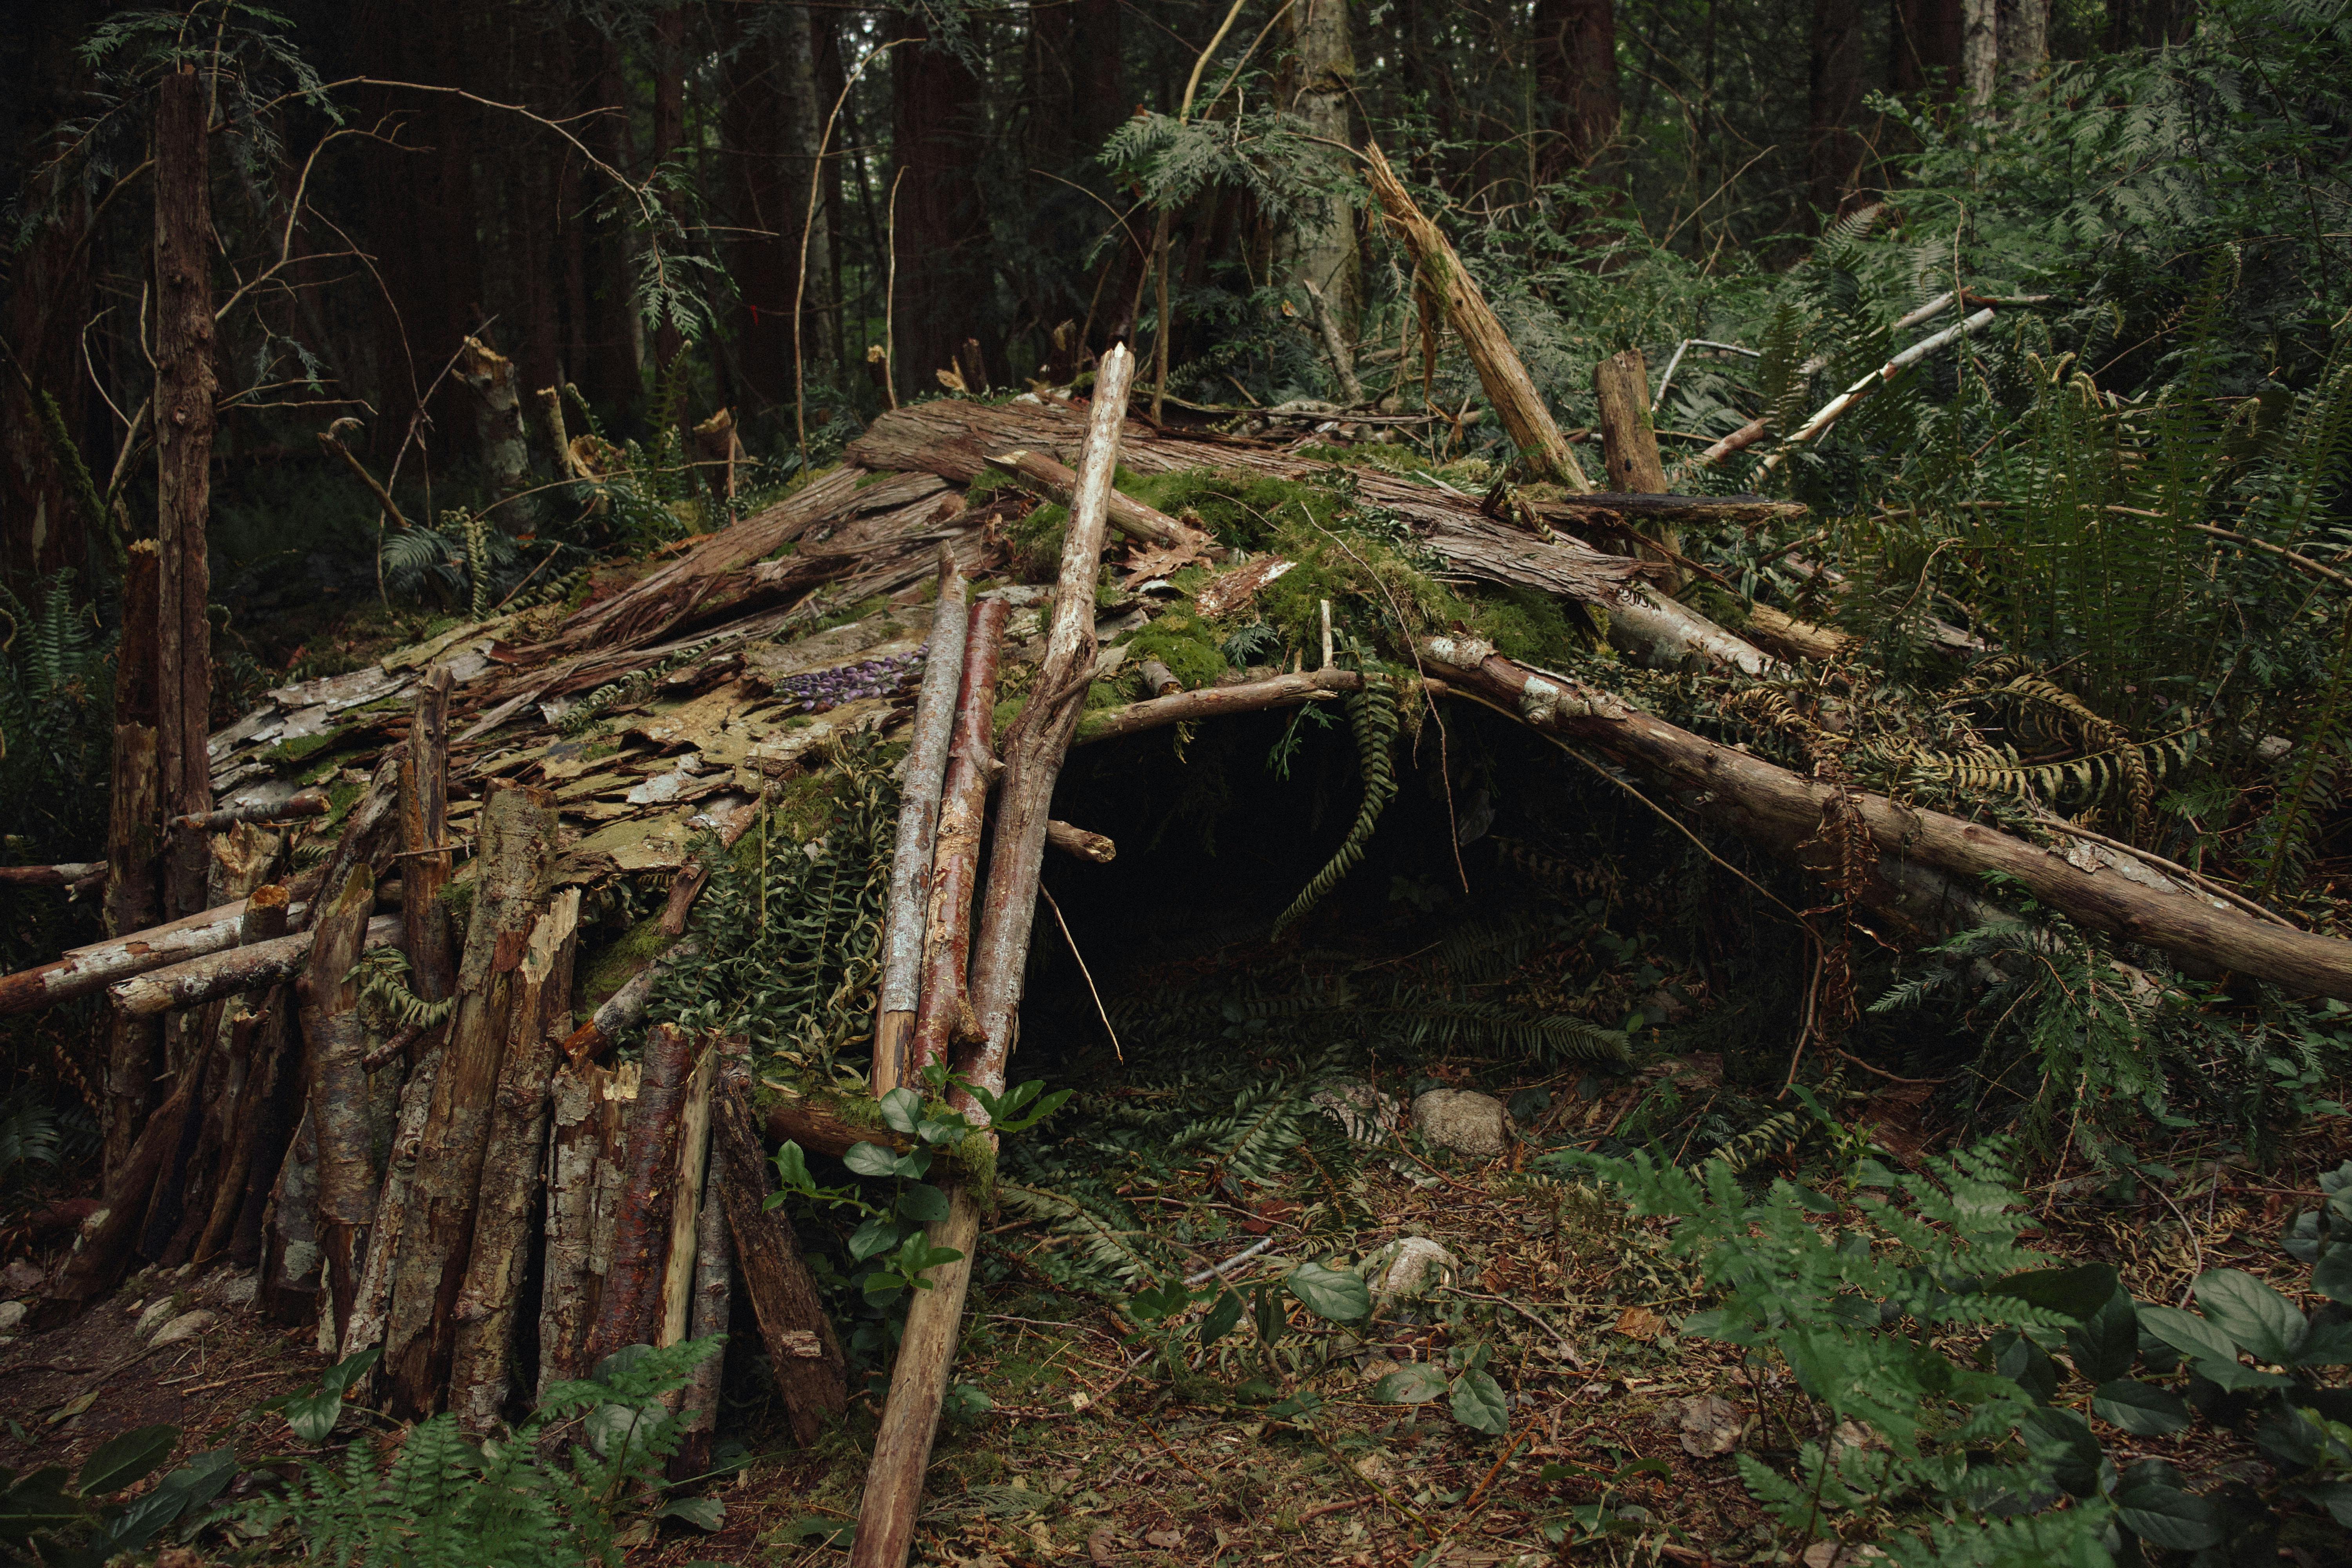
Hollow Base Shelter

A large stump root system, a shallow hollow beside a bank, or a natural pocket at the base of tangled roots can offer a head start when the terrain cooperates. These spots already provide partial walls and a sense of enclosure, which cuts down on building time.
Use sticks and brush to close openings, then load the top and sides with debris to reduce drafts. The goal is not to dig deeper or disturb the site heavily, but to adapt what is present into something more livable for a short stay.
As always, choose carefully. Avoid flood-prone dips, unstable root masses, and signs of animal occupation. A natural hollow can be wonderfully efficient, but only if it is dry, calm, and genuinely safe to use.


